When deciding how to print a conference poster, two main considerations are usually time and cost. While availability of poster printing options vary by institution and location, here I’ll share two favored options from my time at Duke.
Fabric Posters
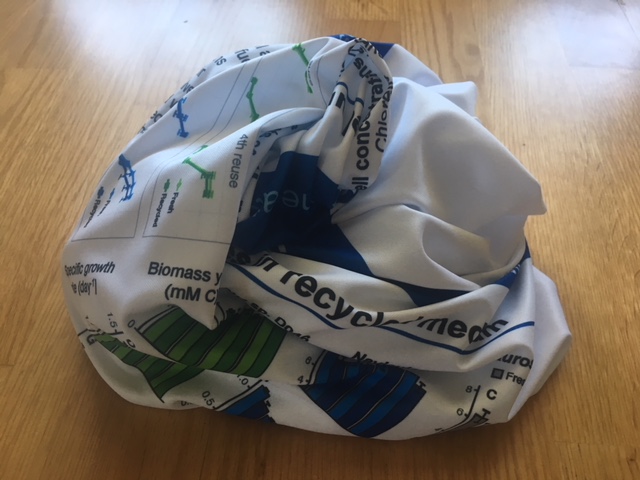
Once you go fabric you won’t want to go back to paper. If you’re traveling to your conference on a plane, a poster tube counts as a carry-on item, likely requiring you to check one of your actual bags. A fabric poster takes up much less space and can fit in your bag, making traveling with it and carrying it to the conference much easier.
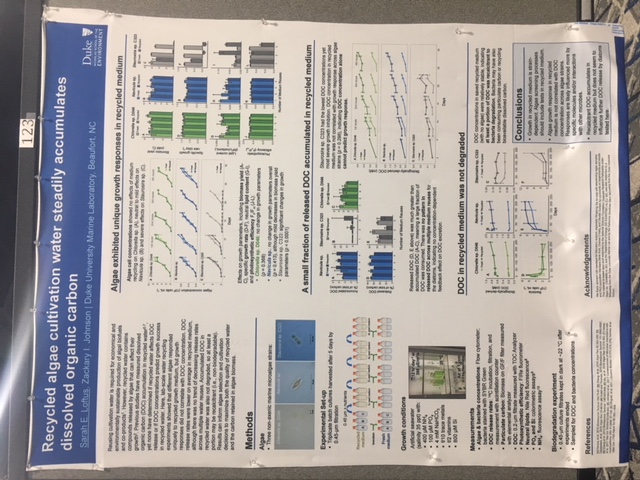
There are several options for fabric posters, but I recommend Spoonflower for cheap – yet quality – printing. I printed my first poster with Spoonflower last month and was happy with the outcome, while only spending $18 plus shipping. Shipping options ranged from $3 (around 8 days) to $25 (around 2 days).
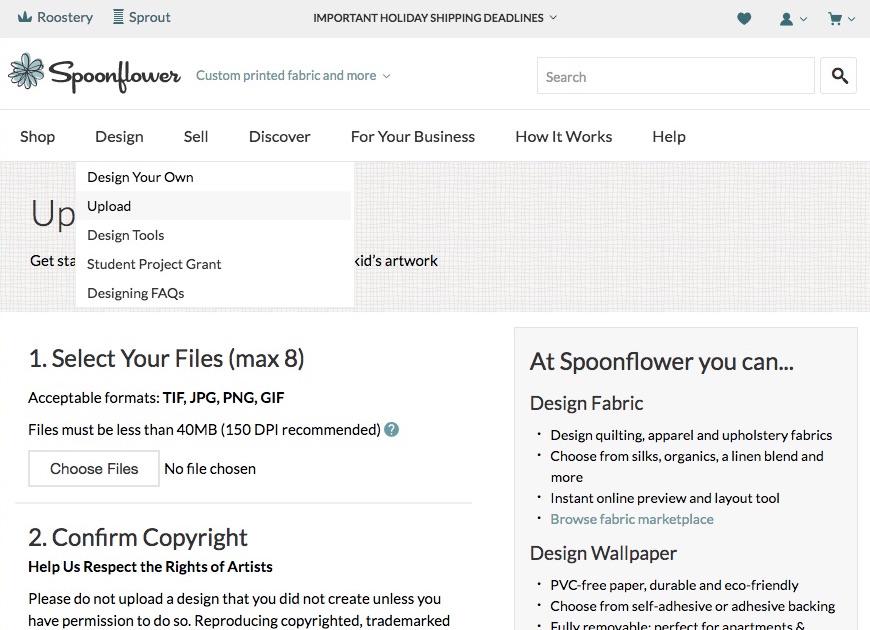
To order a fabric poster, you’ll need to create a Spoonflower account and convert your poster to an image file. You can do this by saving your poster (sized at the actual poster size) as a pdf file, then exporting as a JPEG at 150 ppi. If you have a vertical poster, rotate the image 90º so it’ll fit on the fabric. Upload this image in Spoonflower by clicking the “Design” menu at the top then “Upload.”
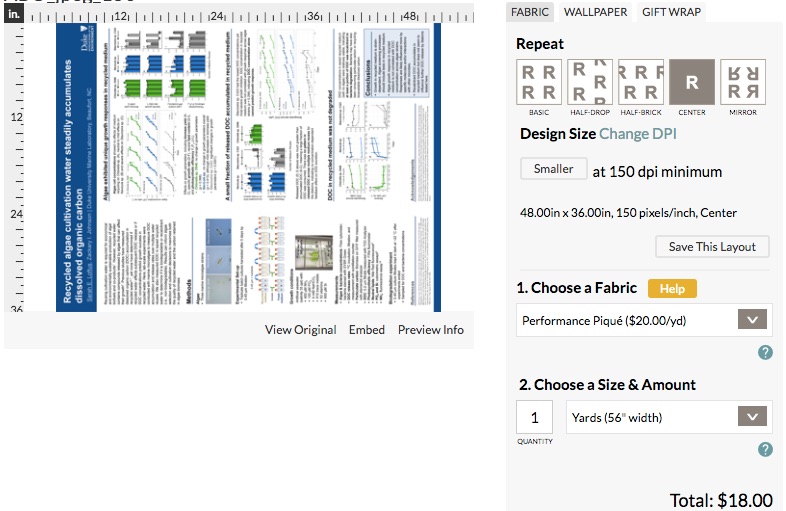
The image may not look correct until you select an appropriate type of fabric. I chose Performance Piqué because that’s what Spoonflower recommended for posters, but other researchers have recommended Performance Knit. Don’t worry if the preview of your poster looks blurry—it won’t look like that when printed. Check that the dimensions and resolution are correct in the preview mode. You can choose to “center” or “repeat” your design in the given space. I chose “center” which meant the poster printed with extra while fabric on the ends. I pinned these behind the poster when hanging it, but next time I’d trim them off.
The printed poster was vibrant and didn’t wrinkle. Many researchers at the conference even commented on the quality of the fabric printing. I needed to use more push pins than usual to secure the top of the poster to prevent slight drooping, but this wasn’t too burdensome. Bring some extra pins with you if you’re not sure how many you’ll need.
After the conference you might even find interesting ways to reuse and showcase your fabric posters. Research poster quilt, anyone?
Paper posters
If you still want to print a paper poster despite my newfound favoritism towards fabric, the best option at Duke is PhD Posters. A semigloss paper poster is about $50. You can pick the poster up directly on Duke’s main campus, or pay to get it shipped. They also have a few other free pick-up locations in New York, Massachusetts, California and elsewhere. The submission process is straightforward, just submit your information online and upload a pdf file of your poster at its desired size. The turnaround time is very quick, usually just 1 or 2 days, and someone will email you with updates throughout the submission and printing process.
For other research poster resources at Duke, check out the Duke Visualization Services workshops on designing effective research posters. You can watch a recording of the last workshop or check for when the next one is offered. You can also email Eric Monson, Data Visualization Analyst, for a one-on-one consultation on your poster.
If you know additional tips and resources for printing and designing research posters, feel free to leave a comment!